Ceeniq · Shot Blueprint
Wide · silhouette lighting
July 21, 2026
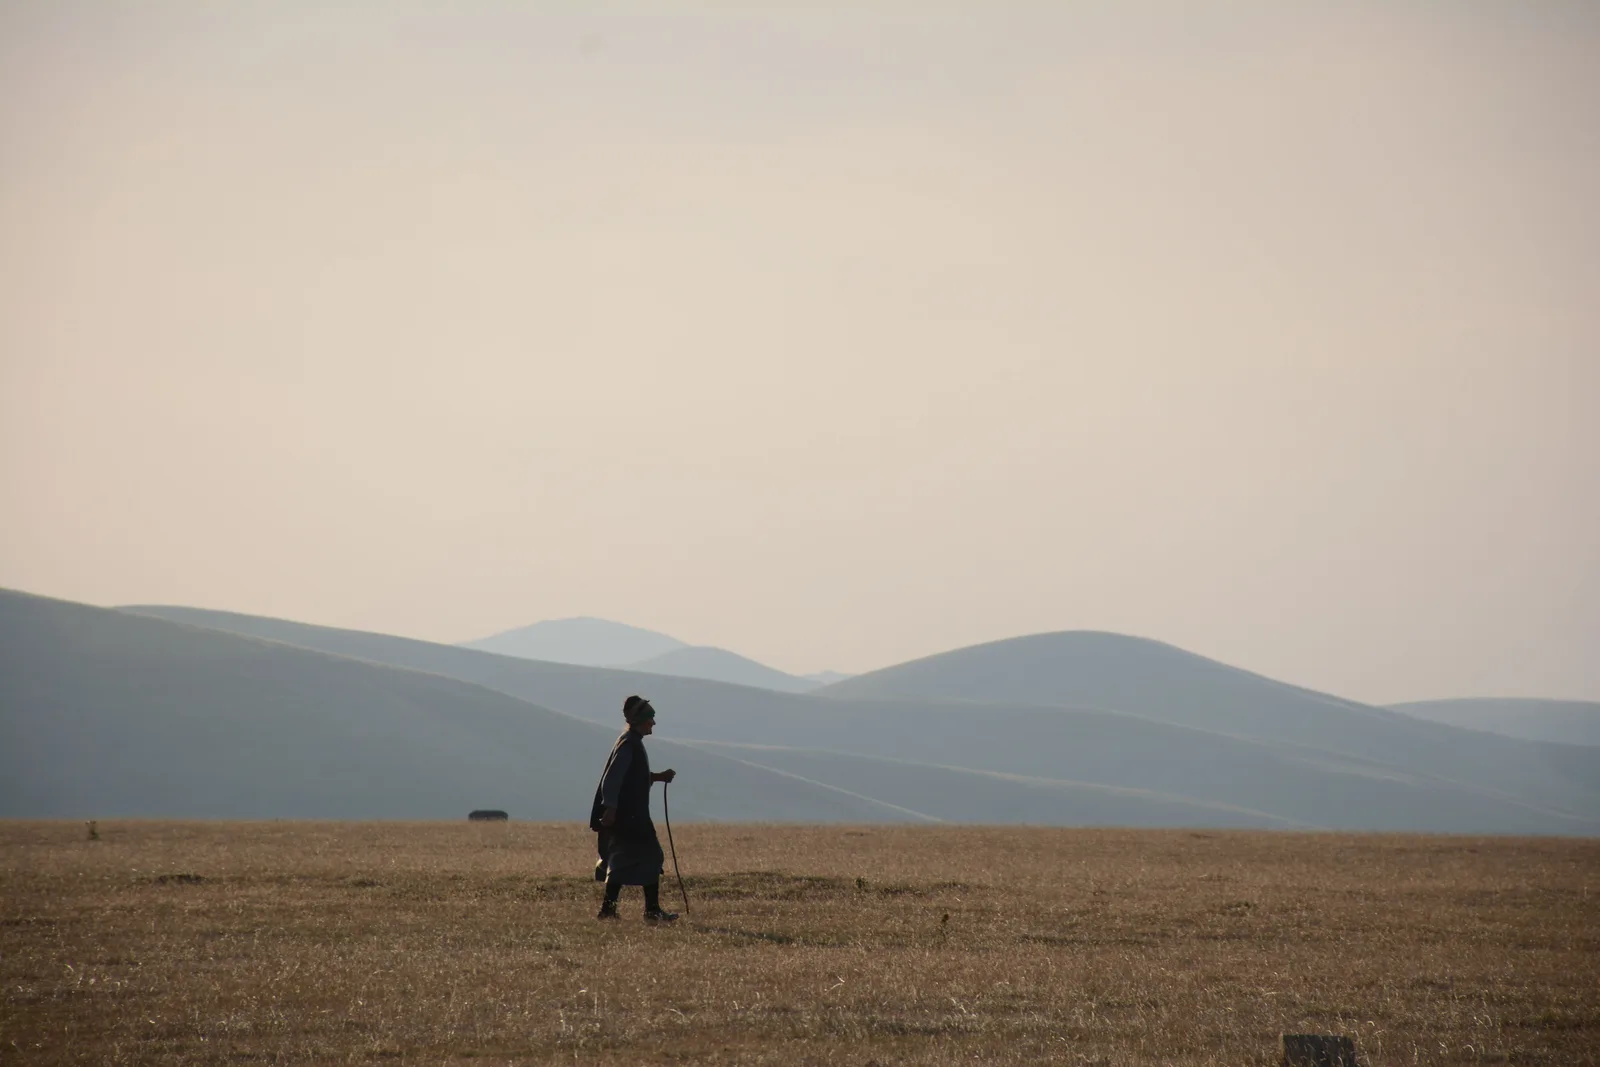
This wide shot features a lone figure silhouetted against a vast, hazy landscape, effectively conveying a sense of solitude and scale. The soft, backlighting emphasizes the subject's silhouette and creates a layered depth in the distant hills. The minimalist composition with abundant negative space allows the viewer to focus on the individual's presence within the expansive environment.
This is a minimalist, atmospheric wide shot that uses a long telephoto lens and natural haze to create a sense of immense scale and solitude. The composition leverages negative space and layers of depth, silhouetting a lone figure against a vast landscape. The key is patience: finding the right location, time of day, and atmospheric conditions is more important than any specific piece of gear.
Camera setup
- Lens
- This was shot on a telephoto lens, likely in the 100mm to 200mm range on a full-frame sensor. This focal length compresses the background, making the distant hills feel larger and more stacked, which creates the layered effect. It also provides a narrow field of view, isolating the subject within the vastness. A 70-200mm f/2.8 or f/4 zoom is the perfect tool here. For a cheaper alternative, a vintage 135mm f/2.8 prime lens or a modern 85mm f/1.8 would work well.
- Position
- The camera is positioned a significant distance from the subject, perhaps 50 to 100 meters away, to allow the telephoto lens to work effectively. The camera height is roughly chest-level, placing the horizon of the foreground just below the frame's center. It's a static, level shot, framed as a profile of the walking figure.
- Settings
- Aperture would be moderately open, around f/4 or f/5.6. This keeps the foreground and distant hills from being tack sharp, contributing to the soft, painterly quality, while still providing enough depth of field to render the landscape. Shutter speed would be a standard 1/48th or 1/50th of a second for 24fps. Given the bright, hazy sky, you would almost certainly need neutral density filters (likely an ND 0.9 or 1.2) to achieve this aperture at a low base ISO like 400 or 800.
- Alternatives
- A 50mm lens would make the scene feel much more vast and the subject smaller, losing the compression that makes the hills feel so present; it would be a more distant, impersonal observation. An 85mm lens is a great compromise, offering beautiful compression while being a bit easier to manage than a longer telephoto. A 300mm lens would dramatically flatten the scene, making the hills appear like a giant, textured wall right behind the subject, further abstracting the space and emphasizing pattern over depth.
Lighting setup
- 1back · at eye level · far
- 2ambient · overhead · far
1.Key/Backlight: Late Afternoon Sun
The sun is low on the horizon, behind the subject and slightly to camera right, acting as a powerful backlight. It's positioned just out of the frame.
The most crucial element is that the sun is heavily diffused by atmospheric haze. This turns the harsh point source of the sun into a massive, soft light that wraps subtly around the silhouette and blows out the sky into a gentle, luminous gradient. No artificial lights are used.
Recreate the look
Starting-point editing settings for each app. Fine-tune against your source image.
Apple Photos
- Warmth
- +25
- Contrast
- -30
- Shadows
- +60
- Highlights
- -25
- Black Point
- +20
Introduces the golden, hazy feel to the sky.
Flattens the image for a softer, more atmospheric look.
Lifts the dark areas to reveal texture and avoid crushed blacks.
Softens the bright sky, preventing it from clipping.
Raises the floor of the image, ensuring a washed-out, hazy foundation.
Equipment list
Telephoto Zoom Lens (e.g., 70-200mm f/4)
To compress the background landscape and isolate the subject.
Budget option: Vintage 135mm f/2.8 prime lens or a 55-250mm kit lens.
View on AmazonSturdy Tripod with Fluid Head
To ensure the static shot is perfectly stable, which is critical when using a long lens.
Budget option: Any solid photo tripod will suffice for a static shot.
View on AmazonND Filter Set (3, 6, 9 stops)
To control the light hitting the sensor, allowing for a wider aperture in bright daylight.
Budget option: A single variable ND filter.
View on AmazonCamera with good dynamic range
To handle the high-contrast scene, retaining some detail in the bright sky and the dark foreground.
Budget option: Any DSLR or mirrorless camera that shoots in a flat or log profile.
View on Amazon
Creative direction
Art & staging
The scene is staged for maximum simplicity and scale. The subject is placed on the left third of the frame, walking right, which gives them visual room to move into and suggests a long journey ahead. Their wardrobe is dark and indistinct, reinforcing the silhouette. The location is the hero: a vast, empty plain in the foreground gives way to layers of rolling hills that fade in color and contrast due to distance and haze, a textbook example of atmospheric perspective.
Director's commentary
This shot is about making the character's journey feel epic and arduous. By placing this small human figure in such an immense landscape, we communicate their solitude and resilience without a single word of dialogue. The direction for the talent is to simply walk with a steady, determined pace. Their posture and gait tell the story. We are not interested in their facial expression; we are witnessing a moment of quiet persistence. The static frame forces the audience to contemplate the character's place in this world and the distance yet to be traveled.
On a budget
This shot is almost entirely achievable on a low budget. The key ingredients are free: location and time. Find a wide-open area with hills in the distance. Go on a hazy, misty, or even a day with high, thin clouds. Shoot an hour before sunset. Use any camera with manual controls and the longest lens you can afford; even an entry-level 70-300mm kit lens will do the job. A tripod is essential for a steady shot with a long lens. The entire look comes from the natural environment, not expensive gear.