Ceeniq · Shot Blueprint
Extreme wide · naturalistic lighting
July 21, 2026
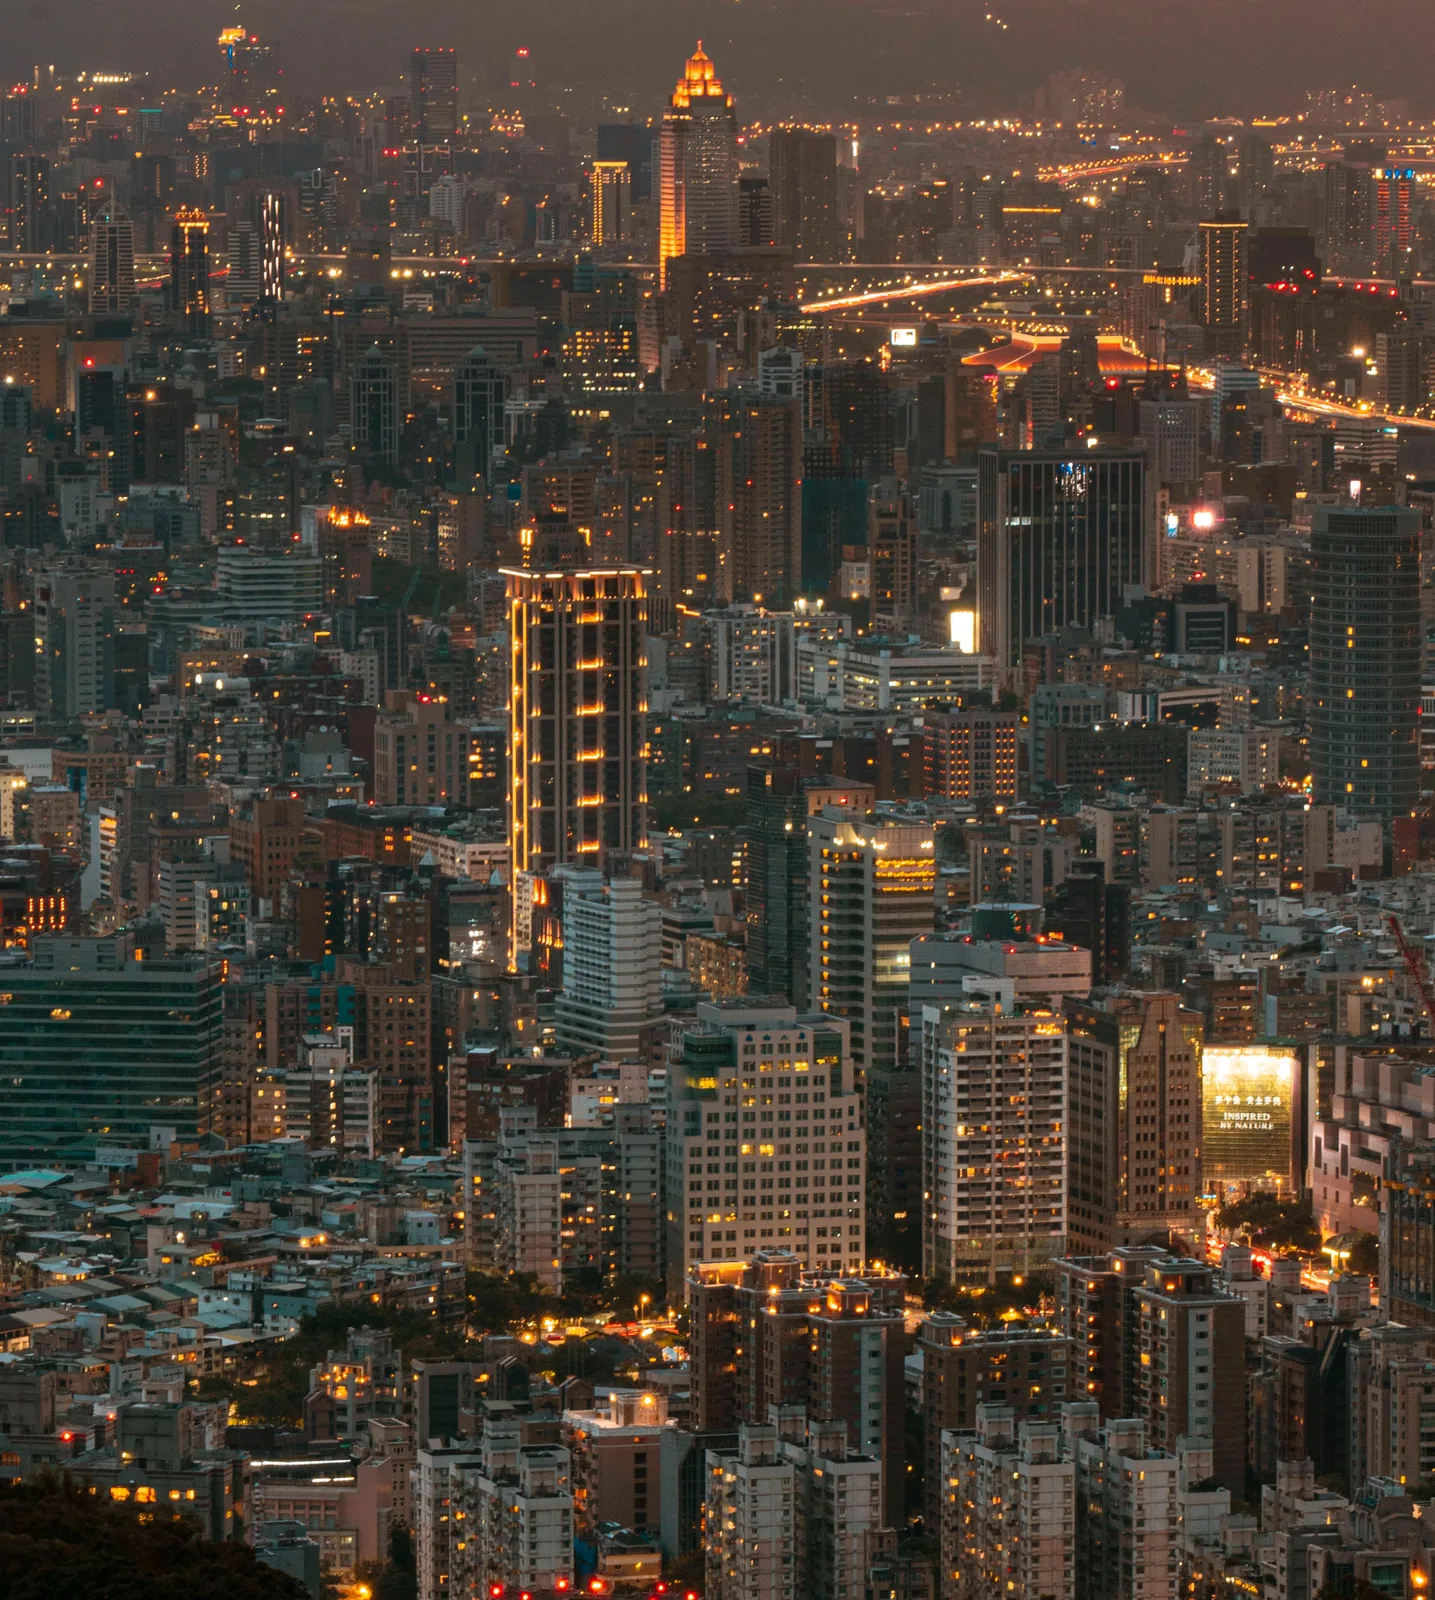
This is an expansive, high-angle extreme wide shot capturing a vast cityscape at twilight. The long focal length compresses the urban landscape, creating a dense tapestry of buildings and a shimmering network of lights that evoke the bustling energy of the metropolis.
This is a classic 'eye of god' cityscape shot, using a long telephoto lens from a high vantage point to compress distance and create a dense, textured tapestry of urban life. The magic happens during late twilight, or 'blue hour', balancing the fading ambient light of the sky with the thousands of artificial lights from buildings and traffic, creating a dynamic contrast between cool and warm tones.
Camera setup
- Lens
- A long telephoto lens, likely in the 200-400mm range on a full-frame sensor. A 300mm is a good guess. This focal length is crucial for the compression effect, which makes distant buildings feel stacked on top of each other, creating the sense of immense scale and density. A professional 70-200mm f/2.8 with a 1.4x or 2x teleconverter would be a standard choice. A more budget-friendly option would be a consumer 75-300mm zoom.
- Position
- The camera is positioned at a very high elevation, likely on a nearby mountain or a skyscraper outside the densest part of the city, looking across the urban expanse. The distance is significant, several kilometers at least. The camera is aimed straight-on, with little to no downward tilt, which enhances the stacked, layered look of the buildings rather than creating a steep, converging perspective.
- Settings
- Given the low light, a sturdy tripod is essential. Aperture would likely be around f/5.6 or f/8 to get a deep depth of field and keep most of the city sharp. Shutter speed would be slow, perhaps 1/15s to 1/60s, to gather enough light without excessively streaking the car lights. ISO would be pushed as needed, probably to 800 or 1600, depending on the camera's low-light capability. A remote shutter or 2-second timer is a must to prevent camera shake.
- Alternatives
- A 135mm f/2 prime would provide a wider, less compressed view, showing more of the city's geography but sacrificing some of the dense, layered feeling. An 85mm f/1.8 would give a classic wide establishing shot, making the city feel vast but less abstract and overwhelming. A 500mm super-telephoto lens would push the compression to an extreme, isolating a small section of the city and turning it into an abstract pattern of light and form, losing the sense of the entire metropolis.
Lighting setup
- 1ambient · at eye level · far
- 2background · overhead · far
- 3practical · at eye level · far
Recreate the look
Starting-point editing settings for each app. Fine-tune against your source image.
Apple Photos
- Exposure
- -0.15
- Highlights
- -30
- Shadows
- +25
- Contrast
- -10
- Black Point
- +15
Slightly darken the overall image.
Recovers detail in the brightest lights and prevents clipping.
Lifts detail in the dark building facades.
Slightly reduces global contrast before adding it back with Black Point.
Crushes the very darkest parts of the image to add punch.
Equipment list
Telephoto Zoom Lens (e.g., 100-400mm)
To compress the distance and create the dense, layered look of the cityscape.
Budget option: 70-300mm or 55-250mm kit zoom lens.
View on AmazonSturdy Tripod
To keep the camera perfectly still for the necessary long exposure in low light.
Budget option: Any basic tripod, weighed down with a bag for stability if needed.
View on AmazonFull-Frame Mirrorless or DSLR Camera
Provides better low-light performance (lower noise at higher ISOs).
Budget option: An entry-level APS-C camera.
View on AmazonRemote Shutter Release or Intervalometer
To trigger the shutter without touching the camera, eliminating camera shake.
Budget option: Use the camera's built-in 2-second timer.
View on Amazon
Creative direction
Art & staging
The primary work of the art department here is location scouting. You need to find a vantage point that offers this compressed perspective of a dense downtown area. The staging is all about timing. The shot must be taken during the narrow window of the blue hour, when the sky is dark enough for the city lights to read brightly, but not so dark that it becomes a black, featureless void. The slight atmospheric haze is a bonus, as it helps separate layers and adds to the glowing quality of the lights.
Director's commentary
This shot is about establishing a world. It tells the audience they are in a massive, vibrant, and potentially overwhelming city. It works as a powerful opening shot, a transition, or a moment of reflection, dwarfing the characters and their concerns against the sheer scale of modern life. It can evoke feelings of awe, loneliness, or opportunity. You direct this shot not by talking to actors, but by choosing the time of day. The slow pulse of traffic and the twinkling of lights become your 'performance', a portrait of a city as a living, breathing entity.
On a budget
This shot is very achievable on a budget. The most important elements are a good vantage point and patience for the right light, both of which are free. Use any DSLR or mirrorless camera with a long consumer zoom lens (like a 55-250mm or 70-300mm). The key piece of gear is a tripod; even a cheap one will work if you use a remote shutter or the camera's self-timer to avoid shake during the long exposure. You don't need any lighting equipment.