Ceeniq · Shot Blueprint
Medium · naturalistic lighting
July 21, 2026
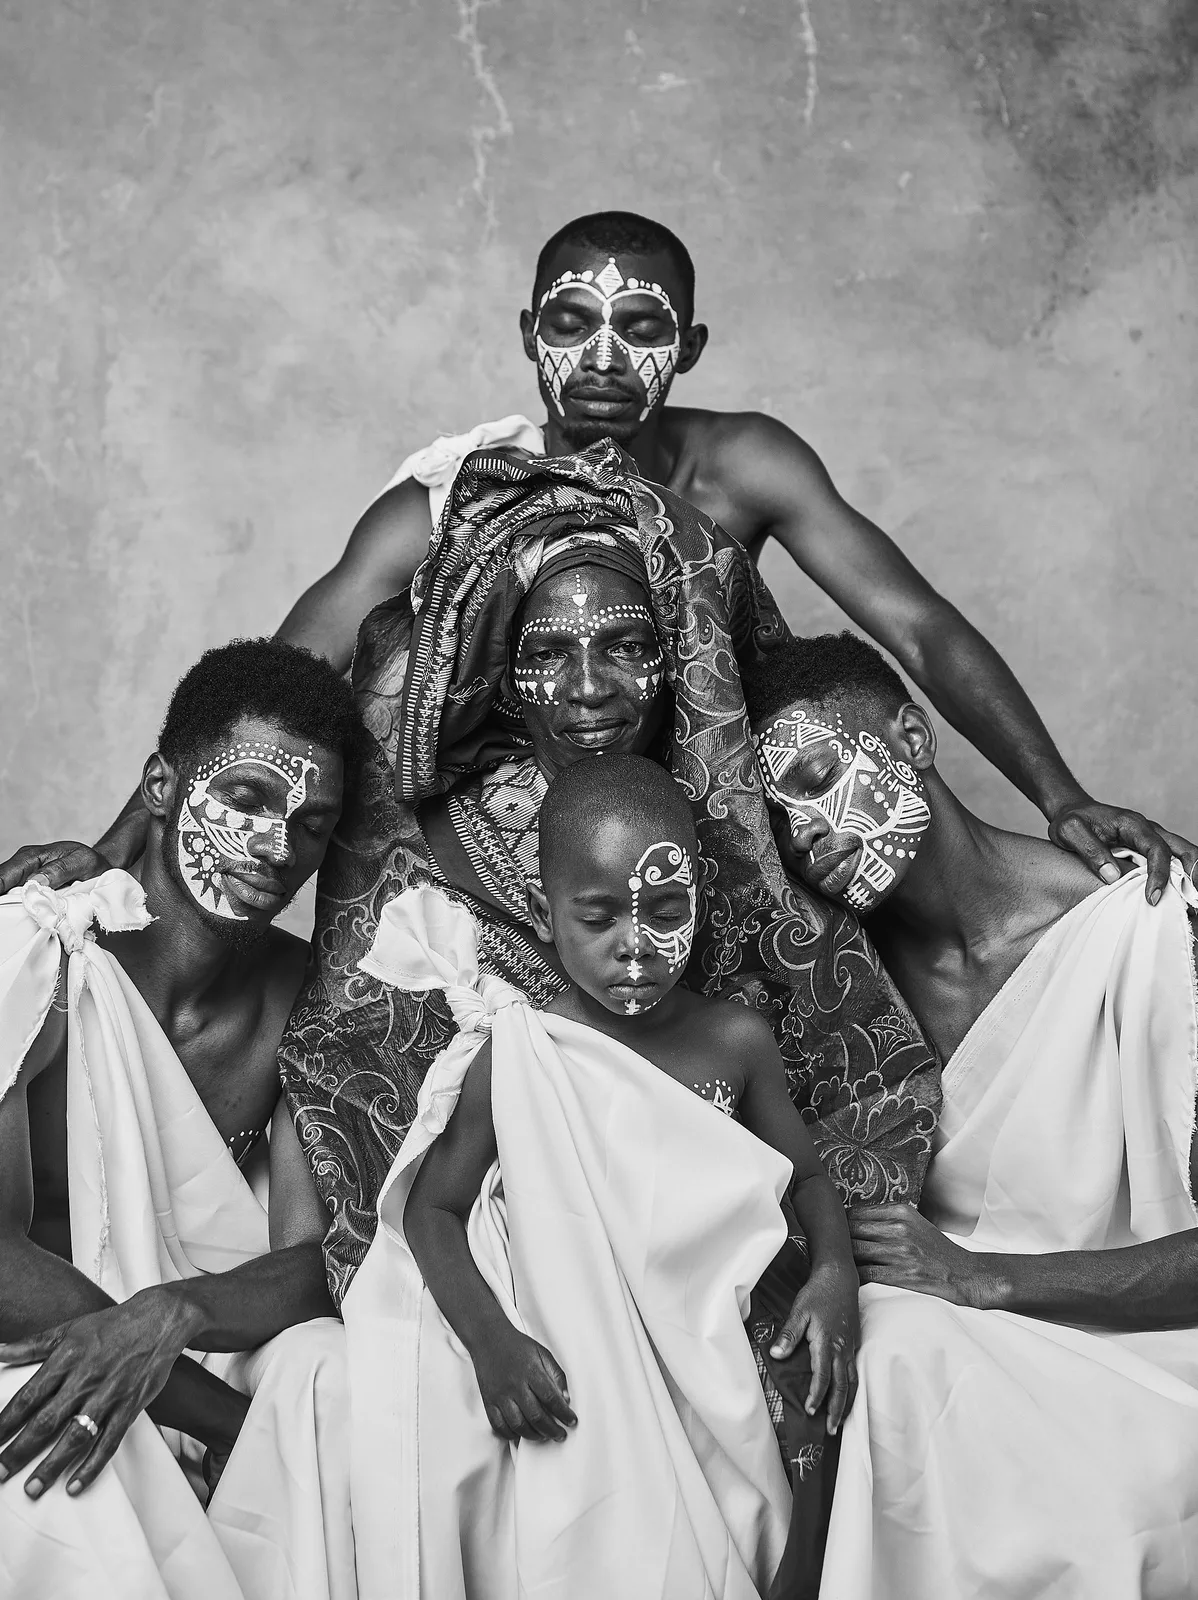
This shot is a dignified group portrait, expertly composed to highlight familial or communal bonds and cultural identity. The subjects are arranged in a strong, almost pyramidal configuration, drawing the viewer's eye to the central figure and the intricate face paint. The soft, even lighting enhances the textures and forms, giving a timeless quality to the image.
This is a formal, studio-lit group portrait with a classical, almost painterly quality. The shot relies on a strong pyramidal composition and soft, frontal lighting to create a sense of dignity, unity, and timelessness. The black-and-white treatment emphasizes form, texture, and the graphic detail of the subjects' face paint.
Camera setup
- Lens
- A medium telephoto lens, likely an 85mm on a full-frame sensor. This focal length provides flattering compression for portraits, isolates the group from the background, and allows for a comfortable working distance. A quality 85mm f/1.8 is perfect. A cheaper alternative would be a 50mm f/1.8, though you'll need to move closer and be mindful of minor perspective distortion at the frame edges.
- Position
- The camera is placed at eye level with the central matriarchal figure, about 10-12 feet away from the group. This creates a direct and respectful point of view. The camera is squared to the subjects, with no significant tilt or angle, reinforcing the formal, composed nature of the portrait.
- Settings
- Use a medium aperture like f/8 to ensure all subjects, from the child in front to the man in the back, are in acceptable focus. In a controlled studio environment, set the ISO to its base (100 or 200) for maximum image quality. If using strobes, set the shutter speed to the camera's sync speed, typically 1/125s or 1/200s.
- Alternatives
- A 50mm f/1.4 would render the scene with less compression, making it feel slightly more intimate and immediate, but you'd risk more perspective distortion on the outer figures. A 100mm or 135mm lens would significantly compress the space, stacking the family members very tightly and rendering the background as a softer, more abstract texture. This would create a more formal, detached, and observational feeling.
Lighting setup
- 1key · above · medium
- 2fill · below · near
- 3background · at eye level · far
1.
Recreate the look
Starting-point editing settings for each app. Fine-tune against your source image.
Apple Photos
- Black & White
- Noir Filter
- Brilliance
- +20
- Highlights
- -30
- Shadows
- +40
- Contrast
- +15
Provides a good starting point for a high-contrast B&W look.
Globally opens up tones without blowing highlights.
Protects detail in the bright white face paint and fabric.
Lifts the darkest areas to reveal detail in hair and skin.
Adds separation and pop to the mid-tones.
Equipment list
85mm f/1.8 Lens
Provides ideal portrait compression and working distance for a group this size.
Budget option: 50mm f/1.8 Lens
View on Amazon6-foot Octabox
The key light source, creating the soft, wrapping quality of light that defines the look.
Budget option: Large window with indirect light or a large shoot-through umbrella.
View on AmazonLarge White V-Flat
Used as a fill light to bounce light back into the shadows for a clean, luminous look.
Budget option: A large piece of foam core or a white bedsheet.
View on AmazonMottled Grey Canvas Backdrop
Provides a neutral, textured background that doesn't distract from the subjects.
Budget option: A grey painted wall or a large grey fabric sheet.
View on Amazon
Creative direction
Art & staging
The subjects are meticulously arranged in a stable, triangular or pyramidal composition, a classic technique in portraiture that conveys strength and harmony. The matriarch is the central anchor, with the other figures branching out from her. Their physical touch, with hands on shoulders, reinforces their connection. The background is a simple, hand-painted canvas with a subtle texture, ensuring it doesn't distract from the rich detail on the subjects. Wardrobe is simple, with white fabric providing a strong tonal contrast against their skin.
Director's commentary
This shot is a testament to lineage, identity, and quiet strength. The direction is all about stillness and connection. The central figure's direct gaze holds the viewer, making her the anchor of the family and the frame. The other figures, with eyes closed or looking down, are in a state of serene introspection. We are not capturing a fleeting moment, but a lasting portrait of a family's soul. The tight pyramidal blocking visually reinforces their unbreakable bond. Direct the talent to be comfortable, to breathe, and to feel the weight and support of each other through their physical touch.
On a budget
Use a large window with soft, indirect daylight as your key light. Have your subjects face it. Use a large piece of white foam core or a white bedsheet held below the camera to bounce light back up for fill. A simple grey wall or a large piece of neutral fabric from a craft store can serve as a backdrop. Any camera with manual controls and a basic 'nifty fifty' 50mm f/1.8 lens can achieve this look.