Ceeniq · Shot Blueprint
Wide · naturalistic lighting
July 21, 2026
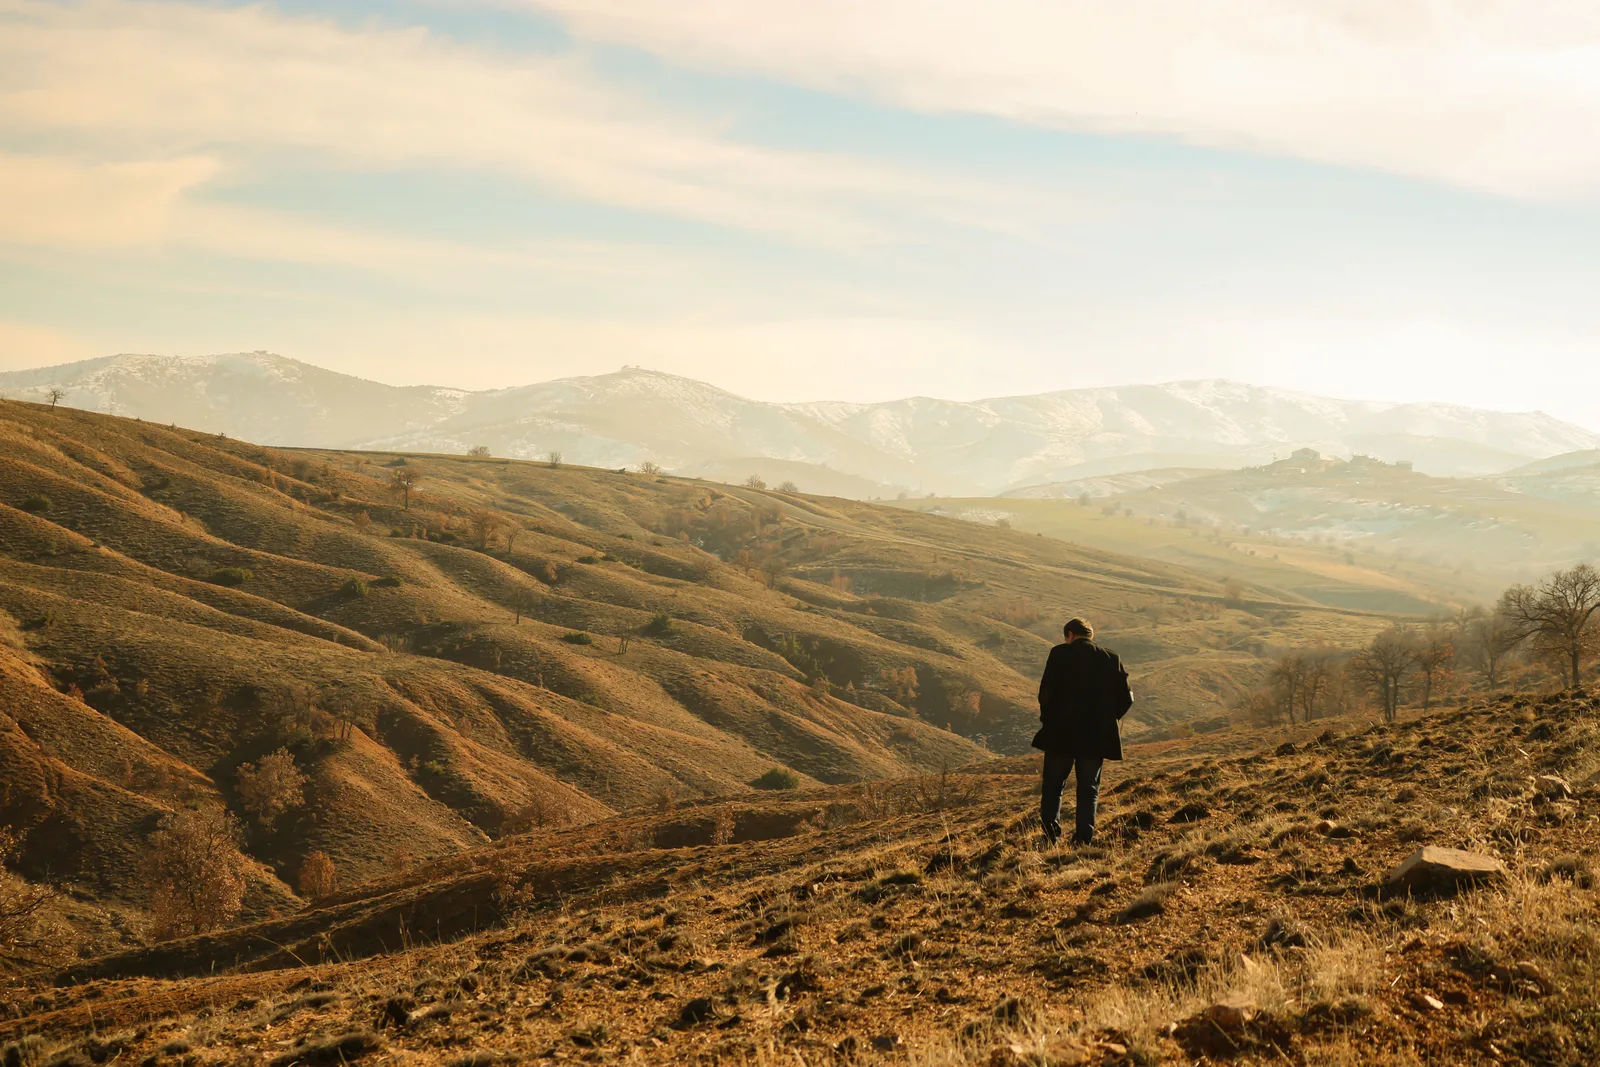
This wide shot places a lone figure against a sweeping, golden landscape, effectively conveying themes of isolation and contemplation. The deep perspective created by the rolling hills and distant mountains emphasizes the vastness of the environment. Warm, soft golden hour light paints the scene, adding to the dramatic and awe-inspiring mood.
This is a classic 'man in a landscape' shot, designed to evoke a sense of scale, solitude, and contemplation. We'll use a telephoto lens to compress the layers of the landscape, making the distant mountains feel present and grand. The entire shot is orchestrated around the low, warm light of golden hour, which does most of the heavy lifting for mood and texture.
Camera setup
- Lens
- A medium telephoto lens, likely in the 85mm to 135mm range on a full-frame sensor. A 100mm prime would be perfect. This focal length compresses the background, stacking the rolling hills and distant mountains together to create a dense, layered vista. It also provides a naturalistic, observational perspective. A good 70-200mm f/2.8 zoom is a versatile choice. For a budget option, an 85mm f/1.8 prime or a vintage 135mm f/2.8 will deliver excellent compression and character.
- Position
- The camera is positioned a considerable distance from the subject, perhaps 50-75 feet, and placed on a hillside to achieve this elevated, eye-level perspective across the valley. The camera height is about chest-level relative to the subject. The angle is straight-on to the subject's back, making them an anonymous proxy for the viewer.
- Settings
- To keep the layered landscape sharp, you'll want a deep aperture like f/8 or f/11. At golden hour, this will require boosting the ISO to around 200-400 to get a clean exposure. Use a shutter speed of at least 1/125s to keep the subject sharp. A sturdy tripod is non-negotiable for a telephoto shot like this to eliminate camera shake and lock in the composition.
- Alternatives
- A 50mm lens would create a much wider view, making the subject feel smaller and more isolated while reducing the background compression; the mountains would feel more distant and less imposing. A 35mm lens would turn this into a grand environmental shot, where the person is just a small detail in an immense panorama. Conversely, a 200mm lens would allow you to tightly frame the subject's shoulders against the abstract textures of the distant hills, creating a more graphic and less narrative image.
Lighting setup
- 1key · at eye level · far
- 2fill · overhead · far
1.Key: Low Afternoon Sun
The sun is low in the sky, positioned to the camera's far left and slightly behind the subject. This creates a three-quarter backlight.
This is the primary source, creating the warm color cast and the long shadows that define the texture of the hills. It acts as a backlight on the subject, providing a subtle rim on their left shoulder and head, separating them from the background. The natural haze in the atmosphere provides all the diffusion needed.
Recreate the look
Starting-point editing settings for each app. Fine-tune against your source image.
Apple Photos
- Exposure
- +0.15
- Highlights
- -40
- Shadows
- +30
- Contrast
- -15
- Black Point
- +10
Slightly lift the overall exposure.
Recover detail in the bright, hazy sky.
Lift the shadows to see the subject's form.
Soften the overall contrast for a filmic feel.
Lift the blacks to prevent deep crushing.
Equipment list
Medium Telephoto Lens (85mm-135mm)
To compress the background layers and create a sense of scale.
Budget option: Vintage 135mm f/2.8 manual focus lens with adapter.
View on AmazonSturdy Tripod
To ensure a sharp, stable image with a telephoto lens in lower light.
Budget option: Any reliable, non-wobbly tripod will suffice.
View on AmazonFull-Frame or APS-C Camera
To capture sufficient dynamic range between the bright sky and shadowed subject.
Budget option: Most modern interchangeable-lens cameras are suitable.
View on AmazonPolarizer Filter (Optional)
To manage reflections and deepen the colors in the sky and landscape, adding contrast.
Budget option: Not essential, can be approximated in post-production.
View on Amazon
Creative direction
Art & staging
The staging is simple and powerful. Place your subject in the lower right third of the frame, facing away from the camera, looking into the vast landscape. The wardrobe is key: a dark coat and pants create a strong, recognizable human shape against the brighter, textured background. The location itself is the main element of production design. Scout for rolling hills that create layered, diagonal lines, with a clear view to a distant mountain range to maximize the sense of depth and scale.
Director's commentary
This shot is about creating a moment of quiet introspection. We are not with the character, but we are watching them be alone. By placing the camera behind them, we encourage the audience to join their perspective, to wonder what they're thinking as they survey the immense landscape. The direction to the actor is minimal: 'Find your mark and just take in the view. Feel the weight or the freedom of this moment.' The power of the shot comes from their stillness against the vast, ancient backdrop. It's a visual metaphor for a character facing a major decision, grappling with loss, or finding their small place in the world.
On a budget
This look is achievable on a minimal budget. The most critical element is timing: shoot during the last hour of daylight. The location is free, requiring only scouting time. Instead of an expensive telephoto zoom, adapt a cheap vintage manual focus lens like a Pentax Takumar 135mm or a Helios 85mm. Any modern DSLR or mirrorless camera will have enough dynamic range. Use a basic, stable tripod; no other gear is necessary. Don't try to add light; the whole point is to work with what nature provides.