Ceeniq · Shot Blueprint
Extreme wide · stylized lighting
July 13, 2026
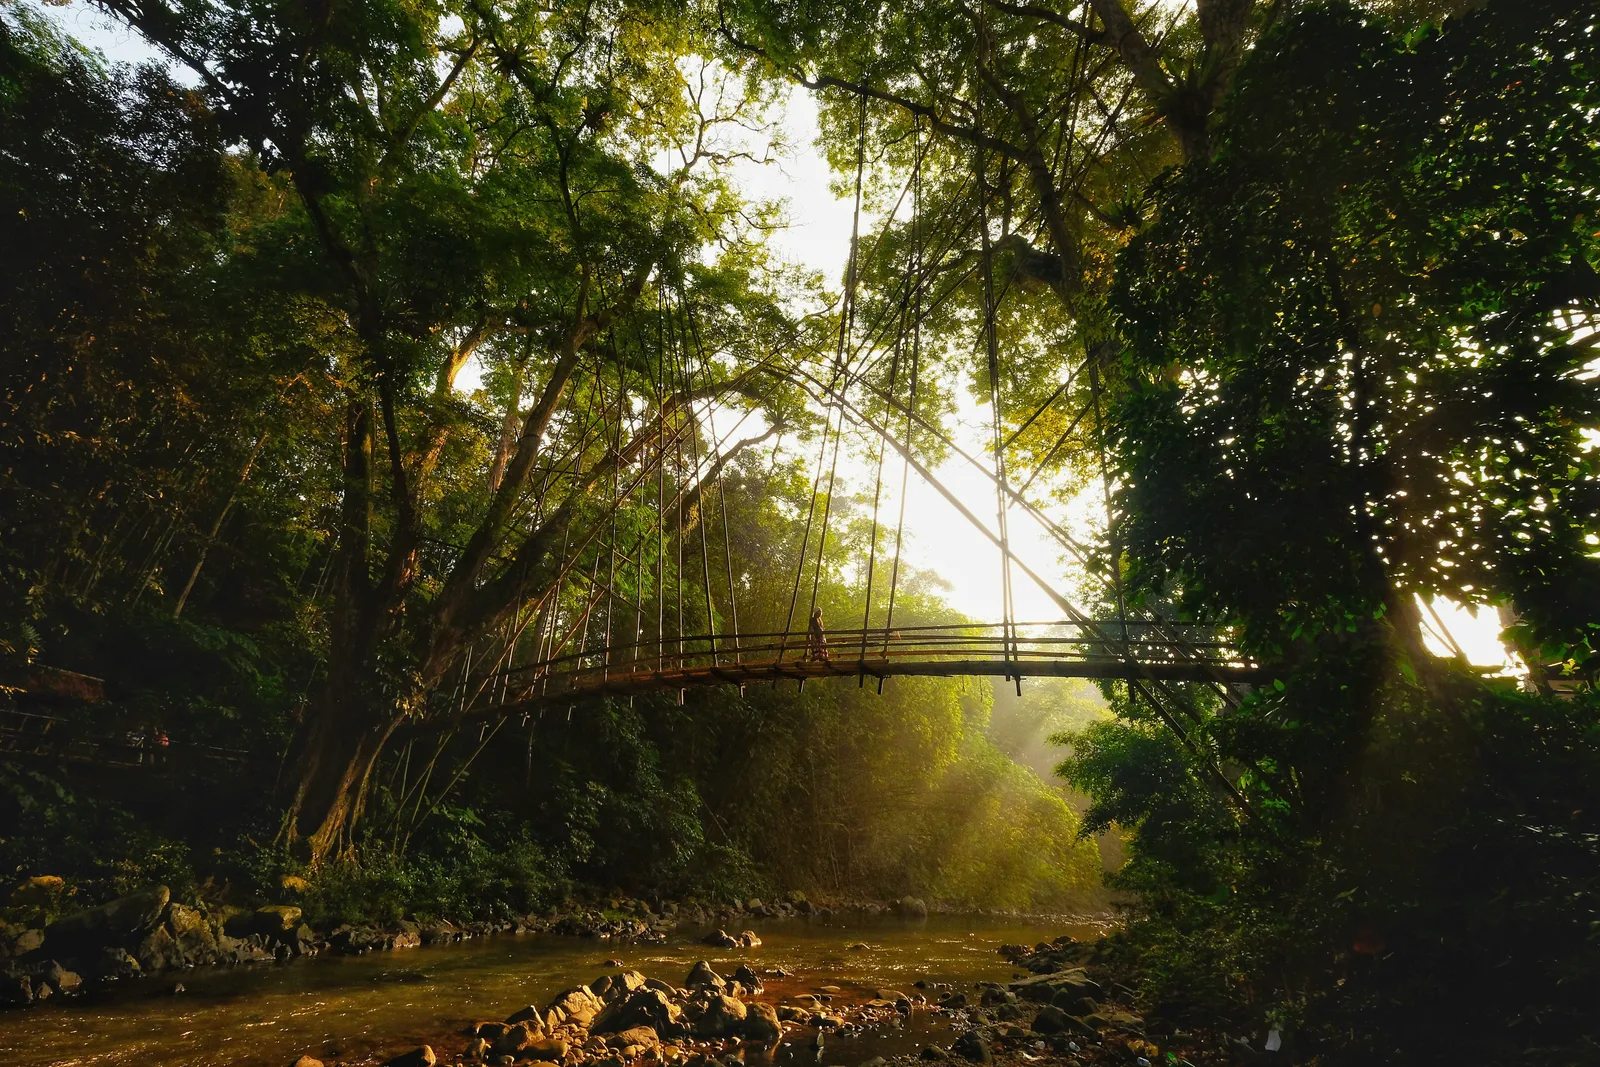
This extreme wide shot captures a person crossing a rustic bridge nestled within a lush, sun-drenched forest. The strong backlighting creates a dramatic silhouette of the canopy and bridge structure, emphasizing the natural beauty and sense of adventure in the scene. The low camera angle enhances the towering scale of the trees and the expansive environment.
This is a classic 'man in nature' wide shot, built entirely around a single, powerful light source: the sun. Our job is to control that backlight. We will use a wide lens from a low angle to create a sense of scale and awe, letting the foreground fall into silhouette while the sun creates atmospheric haze and wraps the edges of the trees and bridge. The key is timing and camera placement.
Camera setup
- Lens
- A 24mm or 28mm prime lens on a full-frame sensor. We need the width to capture the scope of the canopy and the bridge, but without the extreme distortion of something wider. A fast aperture like f/2.8 helps, but we'll likely be stopping down. For a cheaper option, a standard 18-55mm kit lens at its widest setting will work well, just watch for soft edges.
- Position
- Very low, practically on the ground at the river's edge. This low angle is what gives the trees their heroic scale. The camera is about 20-30 meters from the bridge, positioned so the sun is partially obscured by the trees on the right, creating those beautiful god rays through the branches and haze.
- Settings
- Start with your base ISO, likely 100 or 200. We're going for deep focus, so set your aperture to f/8 or f/11. This will keep the foreground rocks and the background trees reasonably sharp. Your shutter speed will then be set to achieve the correct exposure, probably around 1/125s. Expose for the mid-tones of the foliage being hit by the light, and let the sky blow out; trying to save it will make the rest of the image too dark. The blown highlight is part of the look.
- Alternatives
- A 16mm lens would create an even more epic, sweeping view, exaggerating the height of the trees and pulling the viewer into the scene, but you'd risk some noticeable barrel distortion on the bridge. A 50mm lens would compress the scene, making the bridge feel closer to the background trees and creating a more intimate, focused composition. The sense of scale would be diminished, and it would feel more like a portrait of the bridge itself.
Lighting setup
- 1back · above · far
- 3ambient · below · far
1.Key: The Sun
Directly behind the subjects (bridge, trees), positioned high and slightly camera-right. This is a sunrise or sunset shot, with the sun low enough to be in the frame but high enough to clear the distant tree line.
This is the only light source. Its hard quality is diffused by the atmosphere and tree canopy, creating a mix of hard rim light and soft, glowing ambiance. No other lights are needed; they would only flatten the scene and ruin the silhouette.
Recreate the look
Starting-point editing settings for each app. Fine-tune against your source image.
Apple Photos
- Exposure
- -0.15
- Highlights
- -30
- Shadows
- +50
- Contrast
- +20
- Black Point
- +15
Slightly underexpose to protect the highlights.
Recover some detail around the sun.
Lift the shadows to see texture in the foliage.
Add overall punch to the high-dynamic-range scene.
Crush the darkest parts into silhouette.
Equipment list
Wide-Angle Prime Lens (e.g., Sigma 24mm f/1.4 Art)
Provides a wide field of view with excellent sharpness to capture the scale and detail of the forest.
Budget option: A standard 18-55mm kit lens.
View on AmazonFull-Frame DSLR or Mirrorless Camera
A larger sensor provides better dynamic range to handle the extreme contrast between the bright sky and deep shadows.
Budget option: Any camera with manual controls.
View on AmazonSturdy Tripod
Essential for maintaining a stable, low-angle composition and allowing for precise framing.
Budget option: A GorillaPod or even a beanbag to rest the camera on the ground.
View on AmazonAtmospheric Hazer
To create or enhance the atmospheric mist that catches the sunlight, creating visible light rays.
Budget option: Shooting in the early morning when natural mist is present.
View on Amazon
Creative direction
Art & staging
The location does most of the work. You need a dense, overgrown forest with a river and a simple, rustic bridge. The bridge provides a necessary man-made architectural element that contrasts with the organic chaos of the jungle. The subject, a single person, should be placed about a third of the way across the bridge. They are staged to be small in the frame, establishing the immense scale of their surroundings. Their slow, steady walk gives the shot a narrative purpose, a sense of journey.
Director's commentary
This shot establishes a world. It's about wonder, solitude, and the scale of nature versus the individual. We're not interested in the specifics of the character's face; their silhouette makes them a universal figure on a journey. The key to the performance is pace. Direct the actor to walk slowly, with a steady, unhurried gait. They are not rushing; they are either entering a new world or are completely at home within it. The camera is static, allowing the audience to simply observe and be immersed in the environment's grandeur.
On a budget
This shot is mostly free; it's about timing. Get to your location before sunrise. Use any camera with manual controls and a kit lens. A cheap, small tripod is essential for the low-angle stability. Instead of a hazer, rely on the natural morning mist that often settles in low, damp areas like river valleys. The 'perfect' light might only last for 15 minutes, so be set up and ready to shoot.