Ceeniq · Shot Blueprint
Medium wide · naturalistic lighting
July 24, 2026
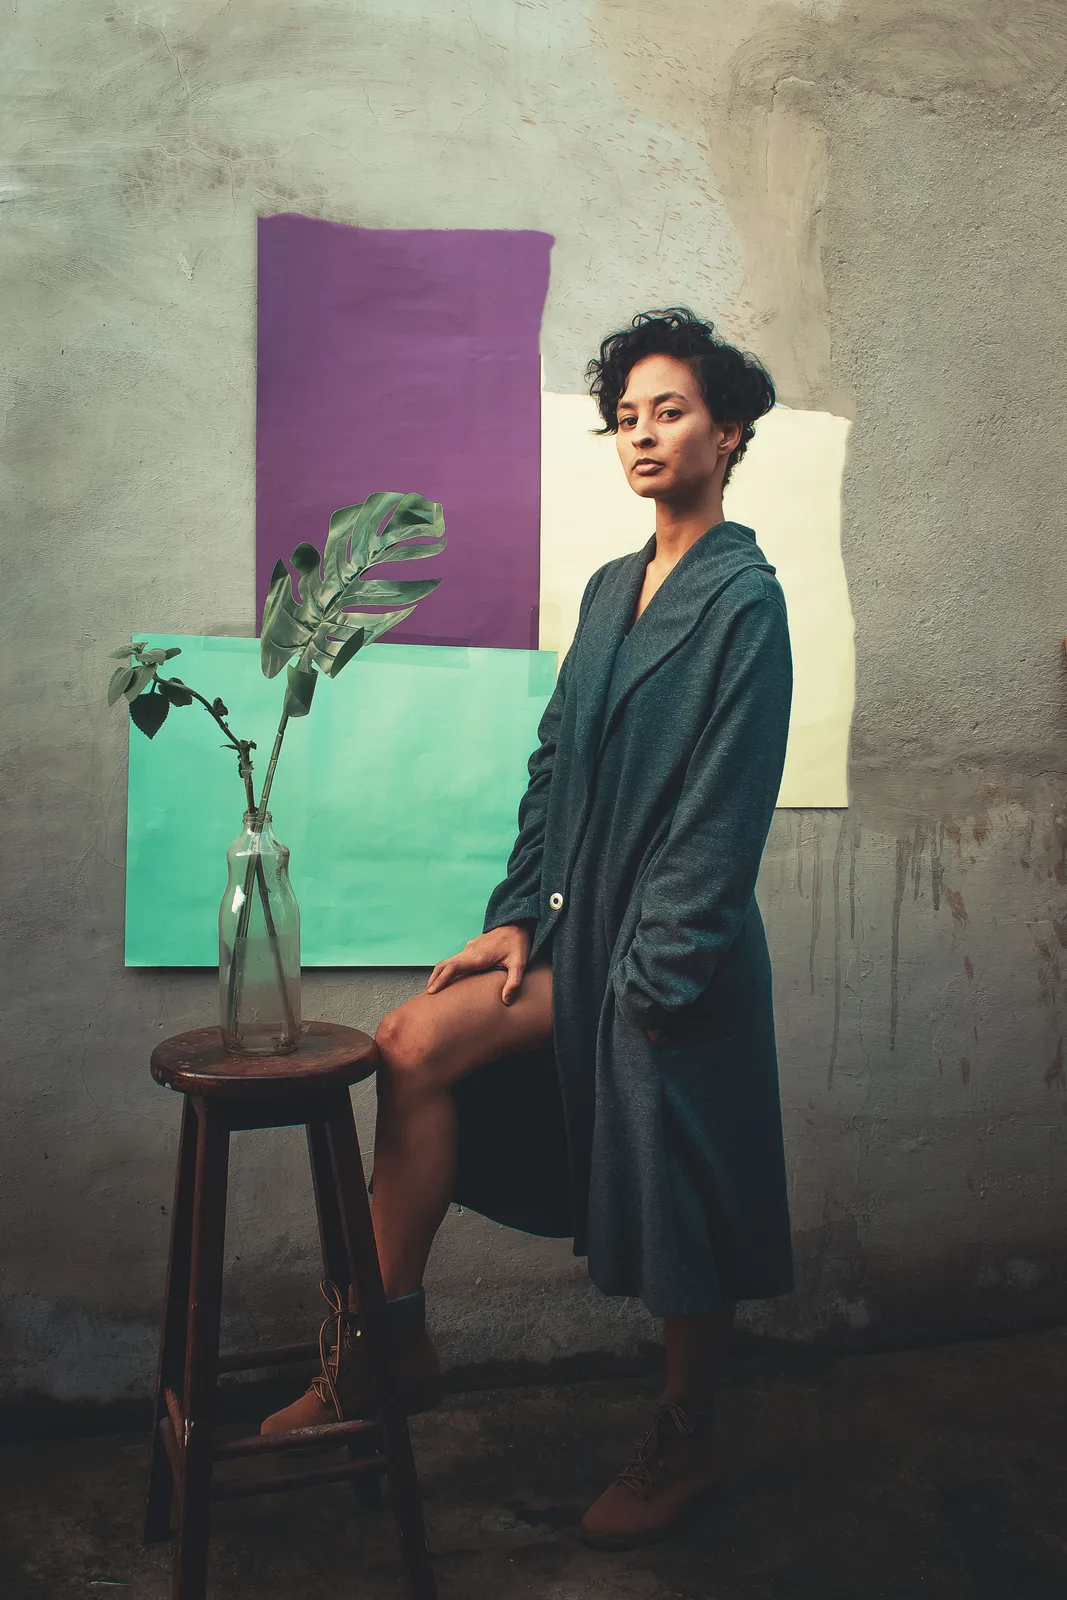
This is a meticulously composed portrait shot, featuring a subject posed against a textured, multi-colored wall. The use of distinct color blocks and naturalistic lighting highlights the subject and creates a striking, artistic aesthetic. The frame effectively balances the subject's pensive gaze with the graphic backdrop.
This is a composed and painterly portrait that balances a raw, textured environment with strong graphic elements. The lighting is soft and singular in direction, creating a mood that feels both deliberate and natural. The key is to treat the shot like a still life painting where the subject is the central, living element.
Camera setup
- Lens
- This feels like a classic portrait lens, likely an 85mm f/1.4 or f/1.8 on a full-frame sensor. It provides beautiful compression, flattening the background elements slightly so they read as a graphic plane, while creating a pleasing separation for the subject. The bokeh is not pronounced, suggesting they stopped down. A cheaper alternative would be a 50mm f/1.8, which requires moving the camera closer but still delivers a great look.
- Position
- The camera is positioned about 10-12 feet from the subject, set at her chest height. It's a straight-on angle, not looking up or down, which creates a direct and peer-to-peer connection with the viewer. The vertical framing (4:5 aspect ratio) emphasizes the subject's posture and the arrangement of compositional elements along the vertical axis.
- Settings
- I'd start at an aperture of f/4. This keeps the subject's face and body sharp while letting the wall texture remain clear without being distracting. With a controlled lighting setup, keep your ISO low, around 100 or 200, to get the cleanest image possible. For a still photograph, a shutter speed of 1/125s is perfectly fine.
- Alternatives
- A 50mm f/1.4 would make the shot feel a bit more immediate and less formal, with a wider field of view. A 35mm f/2 would turn this into more of an environmental portrait, showing more of the surrounding space and making the subject feel more grounded in her environment, though you'd risk some perspective distortion. A 135mm f/2 would offer extreme compression, making the background feel like a completely flat plane and isolating the subject dramatically, creating a very intense and focused portrait.
Lighting setup
- 1key · above · medium
- 2fill · at eye level · medium
1.Key: Large Soft Source
Positioned high and to camera left, about 45 degrees off-axis from the subject. The height creates the gentle downward shadow from her nose and chin, and the angle models the left side of her face, body, and leg.
This is a very soft light. Use a large (e.g., 6-foot) octabox, or bounce a strong fixture like an HMI or a large LED panel into an 8x8 foot ultra bounce or muslin. The quality of light is more important than the specific fixture. It should be diffused enough to wrap around the subject without creating hard shadow edges.
Recreate the look
Starting-point editing settings for each app. Fine-tune against your source image.
Apple Photos
- Exposure
- -0.10
- Highlights
- -30
- Shadows
- +40
- Contrast
- -20
- Black Point
- +15
Slightly underexpose to enrich the colors.
Soften the brightest parts of the image, especially on the skin.
Open up the shadows to reveal texture in the coat and background.
Reduce overall contrast for a flatter, more painterly feel.
Lift the blacks to create a matte, faded look.
Equipment list
Large Octabox (6-ft or larger)
To create the soft, wrapping key light that defines the subject's form without harsh shadows.
Budget option: A large window with northern exposure, or bouncing a powerful light into a white sheet or wall.
View on AmazonFull-Frame Camera
Provides better low-light performance and control over depth of field, contributing to the clean, high-quality look.
Budget option: Any interchangeable-lens camera (APS-C or Micro Four Thirds) will work well.
View on Amazon85mm f/1.8 Prime Lens
Classic portrait focal length for flattering compression and subject isolation.
Budget option: 50mm f/1.8 Prime Lens.
View on Amazon4x4 Black Floppy or Foam Core
Used as negative fill to absorb light on the shadow side, increasing contrast and adding shape.
Budget option: A large piece of black fabric or cardboard painted black.
View on Amazon
Creative direction
Art & staging
The production design is key. The background is a worn, textured wall, likely concrete or plaster, which provides an organic, imperfect canvas. The color blocks are simply large sheets of art paper (you can find these at any craft store) taped to the wall. Their imperfect edges contribute to the aesthetic. The subject is posed to create strong lines, her right leg up on a simple wooden stool. The plant in the glass bottle adds a fragile, organic counterpoint to her stoic pose.
Director's commentary
This shot is about quiet confidence and introspection. The subject isn't performing for the camera; she's allowing us to observe her in her space. The direct eye contact is crucial. It's not an invitation, but a statement of presence. When directing, ask the talent to find a comfortable, grounded pose and to focus their thoughts inward. The goal is a feeling of stillness, where the only tension is in the directness of their gaze. The environment frames her state of mind: creative, a little raw, and unapologetically herself.
On a budget
This entire look can be achieved with minimal gear. Find a room with a single large window for your key light and position the subject relative to it. Use a black bedsheet or piece of cardboard for your negative fill on the opposite side. The background is just craft paper taped to a wall. A basic DSLR or mirrorless camera with a 50mm f/1.8 lens is more than enough to capture this image.