Ceeniq · Shot Blueprint
Medium close-up · naturalistic lighting
July 24, 2026
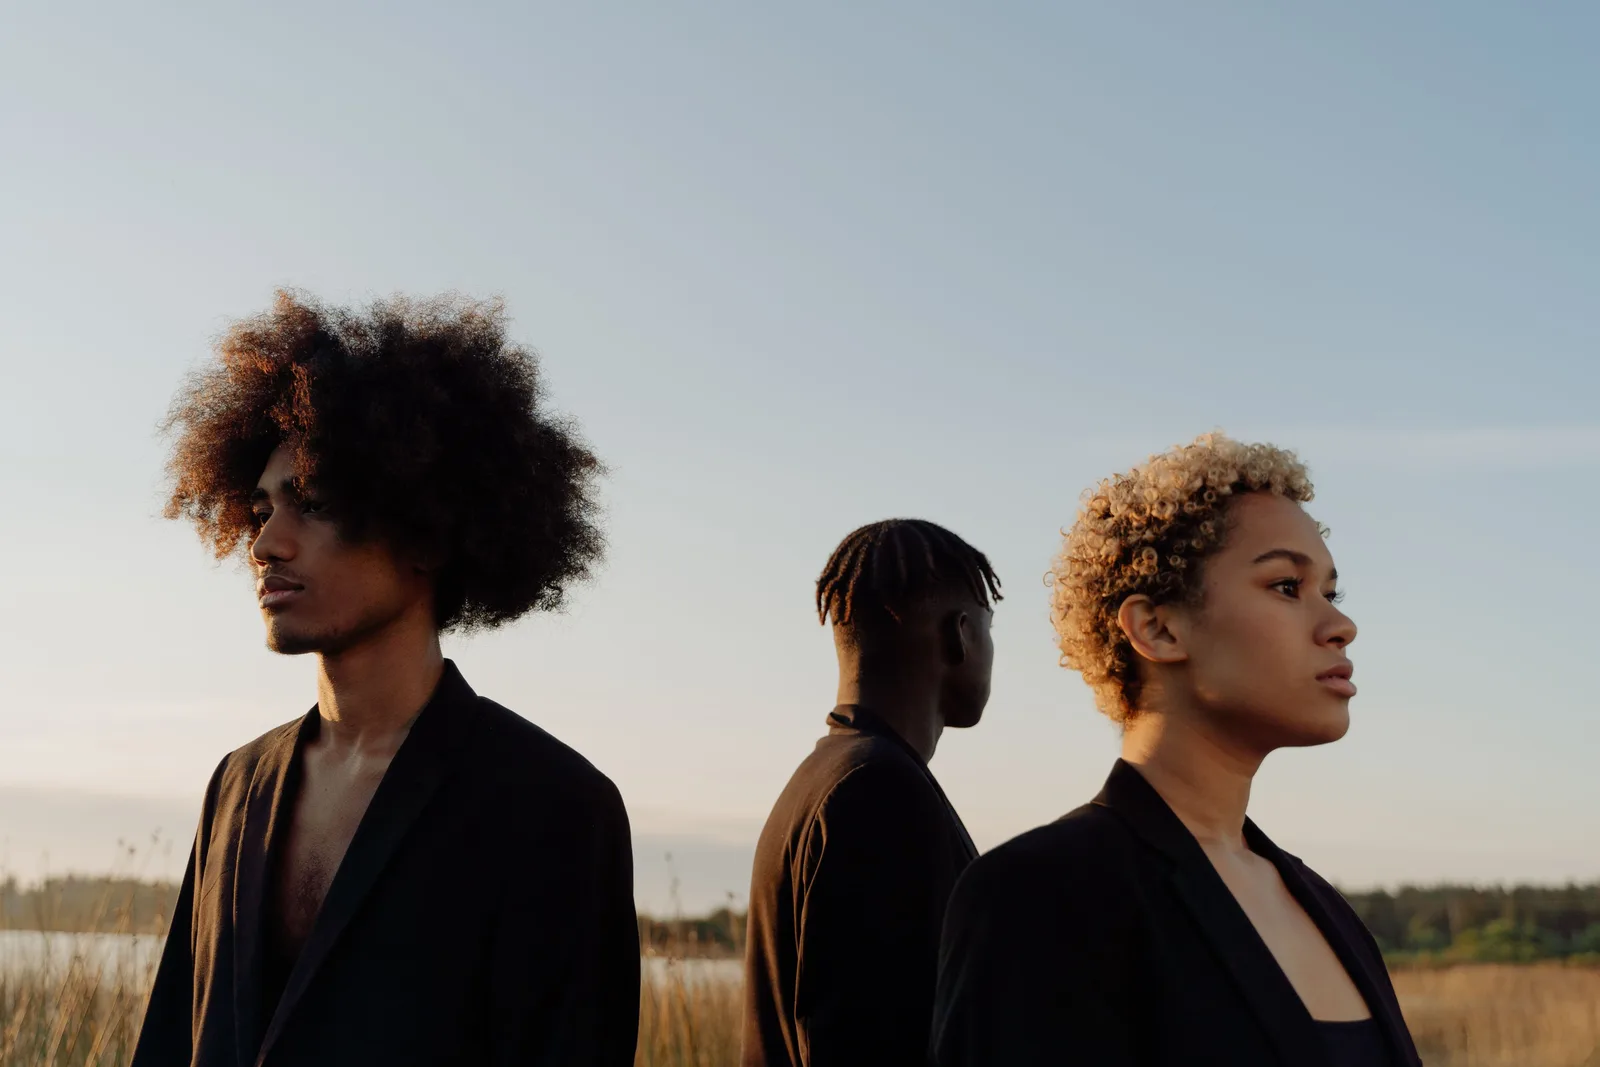
This frame beautifully captures three individuals in a contemplative arrangement against a soft sky and distant landscape. The use of natural golden hour light sculpts their forms and highlights their hair, creating a sense of serene introspection and quiet connection. The clean composition draws attention to their individual expressions and the expansive background.
This is a carefully composed group portrait that leverages the soft, directional quality of late-afternoon sun. The key is using a longer lens to compress the background and isolate the subjects, while positioning them to be backlit by the golden hour light, creating a strong rim light that separates them from the sky.
Camera setup
- Lens
- A medium telephoto lens, likely around 100mm. This focal length provides flattering compression, flattening the subjects' features slightly and turning the distant background into a soft, abstract texture. It allows you to be at a comfortable distance, fostering a natural feel. A cheaper alternative would be a high-quality 85mm f/1.8 prime lens.
- Position
- The camera is positioned at chest height, about 10-15 feet from the nearest subject. It's placed perpendicular to the subjects' line of sight, capturing them in profile. This creates a sense of observation rather than direct engagement. The framing is a medium shot, prioritizing the subjects' expressions and upper bodies against the wide expanse of sky.
- Settings
- With the low sun, you'll need a reasonably wide aperture to gather light and create separation. Start at f/4. This keeps the foreground subject sharp while letting the others fall off gently. Set your shutter to 1/125s for a static shot. ISO should be low, around 100-400, to keep the image clean. You're balancing exposure for the skin tones in shadow, letting the rim light get bright but not clipped.
- Alternatives
- A 50mm f/1.8 would create a more environmental portrait, showing more of the landscape and making the subjects feel more integrated into their surroundings. An 85mm f/1.4 would give you a very similar look with slightly more compression and the ability to achieve a shallower depth of field. A 135mm f/2 would further compress the scene, making the background elements appear larger and closer, creating a more abstract and intensely focused portrait.
Lighting setup
- 1rim · at eye level · far
- 2fill · overhead · far
1.Key/Rim: Low Sun
Positioned low in the sky, behind the subjects and to camera right. This acts as a strong backlight, creating a warm, golden rim around their hair and shoulders.
This is the primary light source shaping the subjects. Its intensity dictates the entire exposure. No diffusion is used; you want the hard quality of direct sun to create that crisp edge. The time of day is non-negotiable for this look.
Recreate the look
Starting-point editing settings for each app. Fine-tune against your source image.
Apple Photos
- Exposure
- -0.10
- Highlights
- -30
- Shadows
- +40
- Contrast
- -15
- Black Point
- +10
Slightly underexpose to protect the highlights in the hair and sky.
Recover detail and color in the bright sky.
Lift shadows to see detail in the dark jackets and faces.
Slightly reduce global contrast for a softer, more filmic feel.
Lift the blacks so they are not crushed, adding to the soft look.
Equipment list
Telephoto Prime Lens (85mm or 100mm)
To compress the background and create flattering portraits with good subject separation.
Budget option: Canon/Nikon/Sony 85mm f/1.8
View on AmazonTripod
To ensure a stable, precisely composed frame, especially as light levels drop.
Budget option: Any sturdy, basic tripod will suffice.
View on AmazonCamera with good dynamic range
To handle the high contrast between the bright, sun-lit rim and the deep shadows.
Budget option: A modern mirrorless or DSLR camera like a Sony A7III or Fuji X-T4.
View on AmazonLarge 5-in-1 Reflector
To add a soft fill light into the subjects' faces if the natural ambient light isn't enough.
Budget option: A large piece of white foam core from an art supply store.
View on Amazon
Creative direction
Art & staging
The subjects are staged in a staggered, overlapping line, creating layers and depth within the frame. The focus is sharpest on the foreground subject, adding to this sense of depth. Their shared direction and pensive expressions suggest a collective journey or state of mind. The background is intentionally simple: a low horizon with water and distant trees, topped by a large expanse of clear sky. This negative space emphasizes the subjects and the mood. Wardrobe is dark and simple, which helps their rim-lit forms stand out.
Director's commentary
This shot captures a moment of shared quietude. The subjects are together, yet isolated in their own thoughts. The direction is about stillness. Ask the talent to fix their gaze on a distant point on the horizon, to breathe slowly, and to let their expressions be natural and contemplative. They are not posing for the camera; we are observing a private, collective moment. The profile angle enhances this feeling of introspection, as they are not acknowledging our presence.
On a budget
This look is achievable on a minimal budget as it relies entirely on natural light. The key is timing; you must shoot within the last hour before sunset. If the natural fill from the sky is insufficient, use a large white reflector or a piece of foam core positioned camera-left to bounce some of the sunlight back into the subjects' faces. An 85mm f/1.8 lens is an affordable and excellent alternative to a 100mm macro or cinema prime.