Ceeniq · Shot Blueprint
Medium close-up · stylized lighting
July 21, 2026
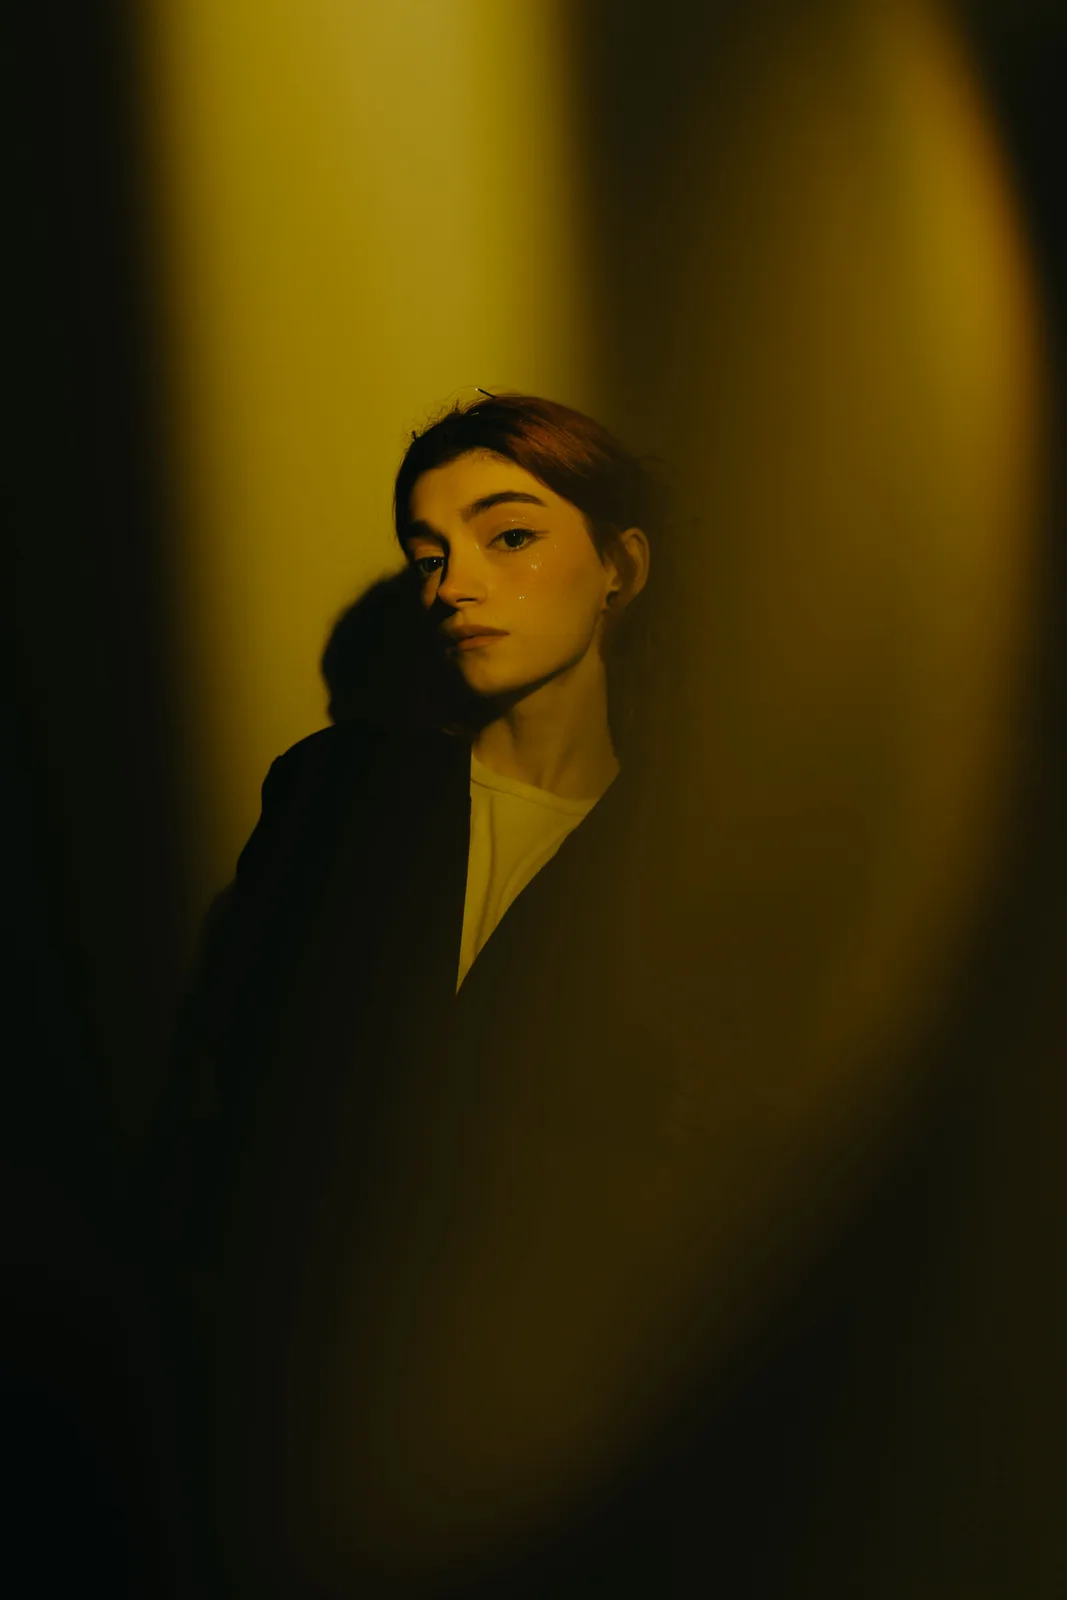
This shot uses a dramatic interplay of hard, directional light and deep shadow to create an intriguing and intimate portrait. The strong diagonal light slice across the frame draws the eye directly to the subject's face, emphasizing their expression and the glitter detail. The stylized lighting and composition elevate a simple portrait into a compelling visual statement.
This is a minimalist, high-contrast portrait that uses a single, carefully shaped light source to create a dramatic, almost painterly effect. The composition is built around the strong diagonal of the light, which isolates the subject and guides the viewer's eye. The out-of-focus foreground element adds a layer of intimacy and voyeurism.
Camera setup
- Lens
- An 85mm f/1.8 prime lens is ideal. This focal length provides flattering compression for a portrait, separating the subject from the background without feeling too detached. A quality 50mm f/1.8 is an excellent, affordable alternative.
- Position
- The camera is positioned at the subject's eye level, approximately five to six feet away to achieve this medium close-up framing. The angle is straight-on, allowing the subject's direct gaze to be the focus.
- Settings
- Start with an aperture around f/2.8 to f/4. This keeps the subject's face sharp while allowing the background to fall into soft focus. Use a shutter speed of 1/125s and set your ISO to the camera's base (usually 100 or 200) to ensure a clean, noise-free image, adjusting the power of your light to get the correct exposure.
- Alternatives
- A 50mm lens would create a slightly more natural field of view, making the viewer feel closer to the subject. A 35mm lens would be more environmental and raw, but you risk some facial distortion if you get too close. A 135mm lens would offer extreme compression, completely isolating the subject and rendering their features in a very flat, graphic way.
Lighting setup
- 1key · above · medium
- 2fill · at eye level · medium
1.Key: Hard spotlight with flag
Positioned high and to camera left, at about a 45-degree angle up from the subject's eyeline and 45 degrees to the side. The key is shaping the light.
Use a hard light source like a Fresnel, a projector mount, or any fixture with barn doors. The goal is to create a sharp, defined edge of light. Use a black flag on a C-stand to cut the beam into the desired diagonal shape across the background and subject. A full CTO gel plus a yellow or gold gel on the light will achieve this rich color.
Recreate the look
Starting-point editing settings for each app. Fine-tune against your source image.
Apple Photos
- Warmth
- +70
- Tint
- -10
- Highlights
- -30
- Shadows
- -50
- Contrast
- +40
Establishes the dominant golden color cast.
Adds a slight green shift to the yellow for a more stylized look.
Recovers any hot details in the brightly lit skin.
Begins to crush the dark areas into deep shadow.
Increases the separation between light and shadow.
Equipment list
Fresnel Light (150W or 300W)
Provides the hard, focusable key light needed for the sharp shadow line.
Budget option: Inexpensive LED spotlight or a powerful flashlight.
View on AmazonC-Stand with Grip Arm
To precisely position the light and, more importantly, the flag for shaping the beam.
Budget option: Any light stand with clamps and gaffer tape.
View on Amazon2'x3' Black Flag (Cutter)
Used to 'cut' the light beam and create the sharp diagonal edge.
Budget option: A large piece of black foam core or cardboard.
View on Amazon4'x4' Floppy (Negative Fill)
To absorb bounce and ensure the shadows are deep and rich.
Budget option: Black bedsheet or a large black piece of cardboard.
View on Amazon
Creative direction
Art & staging
The background should be a simple, plain wall with a neutral color like gray or beige, which will allow it to take on the color of the gelled light without contamination. The subject is staged so the diagonal light cuts just across their right eye. The dark, blurry foreground vignette is a practical effect created by holding a dark object, like a piece of black card or even the edge of a lens hood, very close to the lens on the bottom and right sides of the frame.
Director's commentary
This shot is about creating a private, intense moment with the character. The tight framing and the sliver of light force the audience's focus entirely onto the subject's face and expression. It feels like we are seeing something we are not supposed to, a glimpse into a hidden emotional state. Direct the actor to give a still, direct, and unflinching look to the camera. The emotion should be contained, letting the lighting carry the drama. The glitter under the eye is a powerful detail that can suggest a past event, like tears or a party, adding a layer of narrative intrigue.
On a budget
You can achieve this with a single, inexpensive LED spotlight. Create a 'snoot' out of black cardboard taped to the front to focus the beam. Use another piece of cardboard as a flag to shape the light. The negative fill can be a black bedsheet or piece of clothing hung up. A 'nifty fifty' (50mm f/1.8) lens is perfect for this on a budget. The gold color can come from cheap theatrical lighting gels or even colored cellophane.