Ceeniq · Shot Blueprint
Wide · naturalistic lighting
July 24, 2026
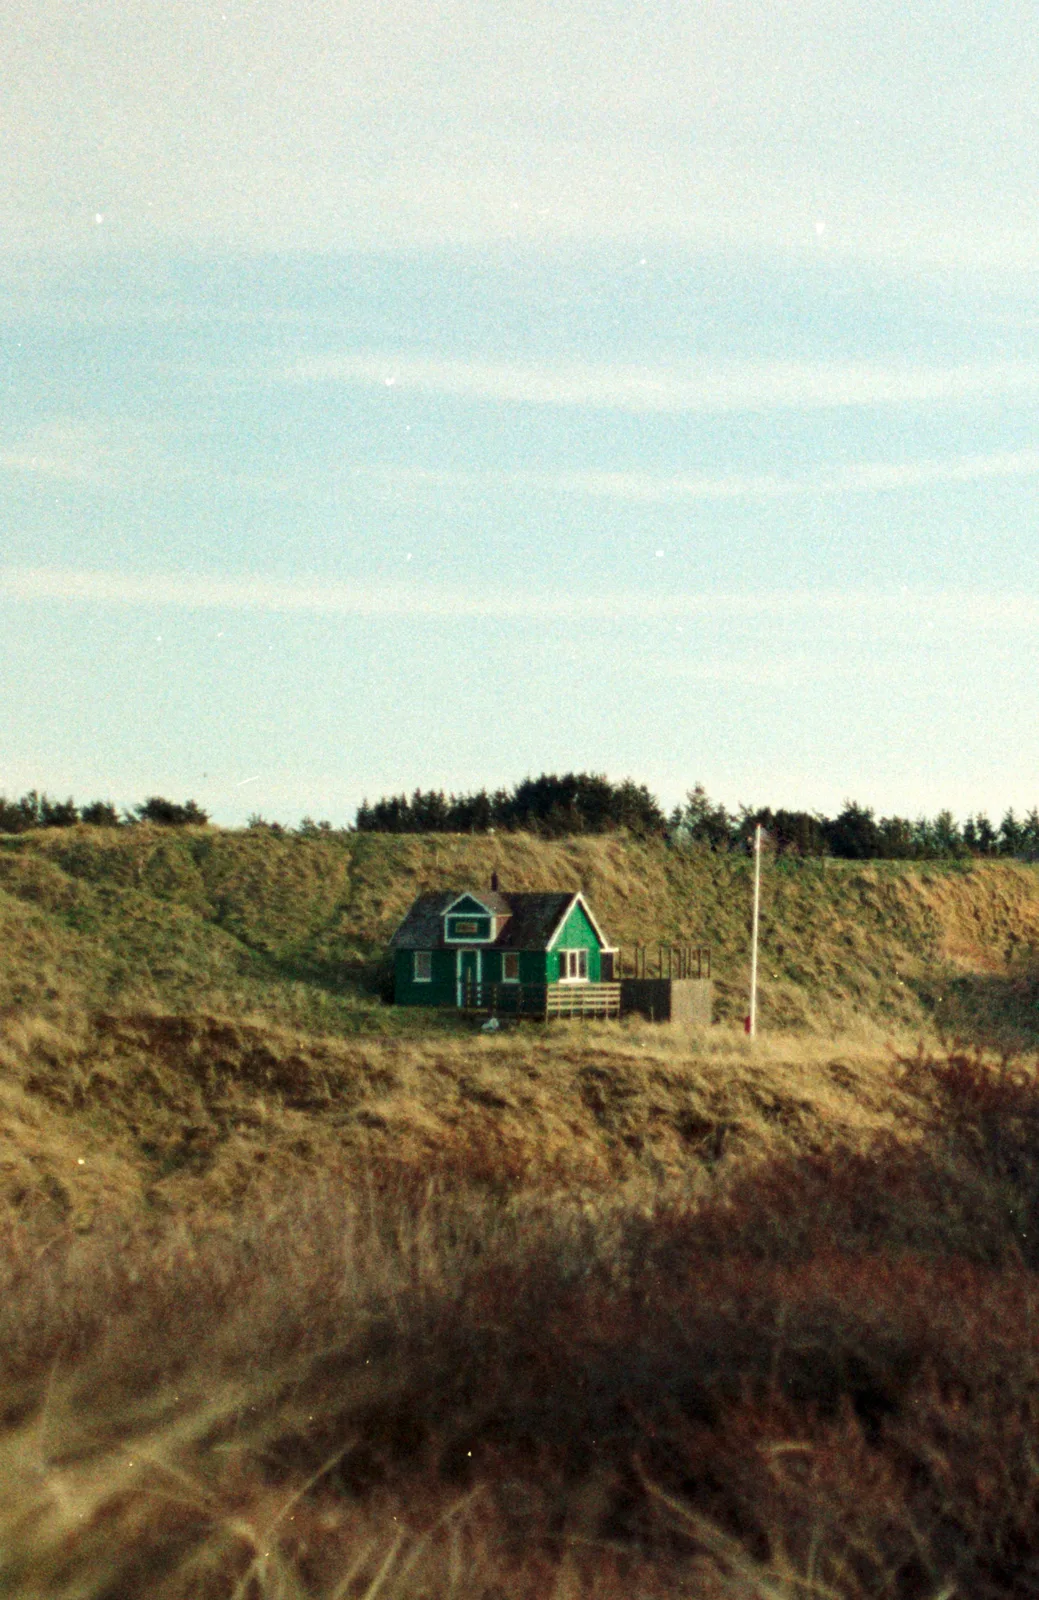
This wide shot features a solitary green house nestled in rolling, grassy dunes under a pale sky, evoking a sense of peaceful isolation. The soft, natural light and slightly desaturated color palette contribute to a tranquil, almost nostalgic mood. The composition emphasizes the vastness of the landscape against the small human dwelling.
This is a classic 'lonely house' tableau shot, creating a feeling of peaceful isolation. The key elements are a long lens for compression, soft natural light from an overcast sky, and a color grade that emulates vintage film stock with milky blacks and a muted palette. The entire mood is built on simplicity and texture.
Camera setup
- Lens
- An 85mm or 100mm prime lens is the ideal choice here. This focal length provides compression, flattening the layers of the grassy dunes and making the house feel neatly tucked into the landscape rather than distant. It also helps to throw the immediate foreground out of focus, creating a soft natural frame. A budget alternative would be a vintage manual focus lens like a Jupiter-9 85mm f/2 or a Takumar 135mm, which often have a softer rendering that would suit this look.
- Position
- The camera is positioned a considerable distance from the house, likely 50 to 100 yards away, to achieve this framing with a telephoto lens. The height is at a standing eye level, approximately 5 to 6 feet off the ground, looking straight across at the subject. There is no significant tilt. Placing some tall grass or reeds just in front of the lens creates the soft, out-of-focus texture in the lower third of the frame.
- Settings
- Assuming a digital cinema camera, start with a base ISO of 400-800 to get some texture. Use a 180-degree shutter (1/48th or 1/50th sec at 24fps). The aperture should be around f/5.6 or f/8 to ensure the house and the hills directly behind it are in focus, while still allowing the foreground grass to go soft. On a bright, overcast day, you will likely need a 0.9 or 1.2 ND filter to achieve this exposure.
- Alternatives
- A 50mm lens would make the house appear smaller and more distant, emphasizing the scale of the landscape and increasing the feeling of isolation. A 135mm lens would provide even more compression, making the dunes feel stacked right behind the house and creating an even more voyeuristic, flattened perspective. A 35mm lens would drastically change the shot, turning it into a vast landscape where the house is just a small detail, with the foreground elements becoming much more dominant.
Lighting setup
- 1key · overhead · far
1.Key: Overcast Sun
High and slightly to camera right. This is the sun acting as a giant, diffused source, filtered through a layer of high clouds or haze.
The quality is incredibly soft, creating minimal, gentle shadows. There is no harsh specularity. The goal is an even, low-contrast illumination across the entire landscape. This is achieved by shooting on an overcast day or during the 'magic hour' when the sun is low, though the shadow length suggests midday.
2.Fill: Ambient Skylight
Omnidirectional, coming from the entire sky.
The large, overcast sky acts as a massive bounce card, filling in any shadows created by the key light. The ratio between key and fill is very low, maybe 2:1 at most, which contributes to the flat, painterly quality of the image.
Recreate the look
Starting-point editing settings for each app. Fine-tune against your source image.
Apple Photos
- Exposure
- +0.15
- Highlights
- -30
- Shadows
- +50
- Contrast
- -25
- Black Point
- +20
Slightly lift the overall brightness.
Soften the bright sky.
Lift the shadows to reveal detail.
Reduce overall contrast for a flatter look.
Key step to create the faded, milky blacks.
Equipment list
85mm or 100mm Prime Lens
To compress the landscape and isolate the subject, creating a painterly composition.
Budget option: Vintage M42-mount telephoto lens (e.g., Pentax Takumar 135mm) with an adapter.
View on AmazonSturdy Tripod
To hold the camera perfectly still for the static, tableau composition.
Budget option: Any functional tripod will do; stability is key.
View on AmazonND Filter Set (0.6, 0.9, 1.2)
To control exposure on a bright day while maintaining a desired aperture and shutter speed.
Budget option: A single, variable ND filter.
View on AmazonCinema Camera with Super 35 or Full-Frame Sensor
To capture a high-quality image with good dynamic range and color science, providing flexibility in the grade.
Budget option: A mirrorless camera with a flat picture profile (e.g., Sony A7S series, Blackmagic Pocket Cinema Camera).
View on Amazon
Creative direction
Art & staging
The power of this shot comes from its art direction and location scouting. The subject is a simple house, painted a specific dark green that contrasts with the muted, warm tones of the dried grass. The landscape should feel natural and unmanicured. Staging involves placing the camera so the undulating lines of the dunes create layers and lead the eye. The out-of-focus foreground grass is a deliberate choice; if the location lacks it, you may need to 'dress in' some tall grass or branches close to the camera.
Director's commentary
This is an establishing shot that does more than just show a location; it sets a tone of solitude and contemplation. The static, long-lens frame creates a sense of watching from a distance, making the viewer an observer of this quiet world. The house itself becomes a character. Is it a cozy refuge or a lonely outpost? The lack of human activity forces the audience to project their own feelings onto the scene. Direct the art department to ensure the house's color and condition tell the intended story. This is a shot for holding on, letting the audience breathe and absorb the mood before the narrative continues.
On a budget
This look is very budget-friendly as it relies on natural light and location. The most important thing is finding the right spot and waiting for the right weather (a bright but overcast day). Use an inexpensive vintage telephoto lens on a mirrorless camera with an adapter. You don't need any lighting equipment. The color grade can be accomplished entirely within the free version of DaVinci Resolve, focusing on curves, saturation adjustments, and the built-in film grain effect.